Tuesday 31 January 2012

Funcia di basilicu (part 2 - complete)

My work has cured a lot quicker than anticipated so is ready for the next stage.

So above you can see how things started off this morning.

Below you can see an early stage in the painting. The painting process I used here is quite simple. I mix the colour I want with quite a lot of water. In this case I've used a darker slightly less watered paint for the fungus and then gone over the whole lot with a lighter thinner colour.

After this I blot the entire picture and the darker colour of the fungus will come through along with some texture influence from whatever I pick to blot with.


Now "Funcia di basilicu" is not complete above. It was also not my only work today, I also finished a fun painting, "Pacman Flashback".

You can see the completed "Funcia di basilicu" HERE.

You can see the completed "Pacman Flashback" HERE.

Monday 30 January 2012

Funcia di basilicu (part 1)

Fungus is not something you tend to give a second thought to most days, am I right? I am.

I think there are aspects of this range of organisms to provide food for thought. And food for, well food too, in some cases.

Take the case of "Funcia di basilicu" which is a fungus perhaps little known beyond Sicily where, even there, it only grows in a fairly small area. For me this thing has a number of interesting properties. It forms an interesting shape, it lives somewhere I might like to go on holiday, you can eat it and it is (I gather) delicious. There are other properties that lead me to select this fungus as my subject but I will tell you about those another time.

I will be doing a number of smaller paintings so I begin with a large canvas that I'm cutting up.

Well, they say a picture paints a thousand words. I don't think we need those words here.
Next I do the diligent thing and put gesso on the canvas squares & allow them to dry.

I will be doing another engraving but some things will be in a different order. I start with the usual undercoat background.
Sure, it's not very exciting yet... but you never know what's coming next...

Tools! Now I'd found it tricky getting the most out of a jar of moulding paste with my moulding knife. There was a reasonable volume of stuff that was a pain to get out. I wanted a spoon but obviously this is not the job for your family silver. I remember that one of my daughters use to be very fond of a particular bent yellow plastic spoon when she was a toddler. She'd grip this spoon with her whole fist and shovel in whatever food you put in front of her. If only we could get her to eat everthing with such gusto now. Anyway, I found the spoon, it works a treat and it was lovely for me looking back on those toddler days.

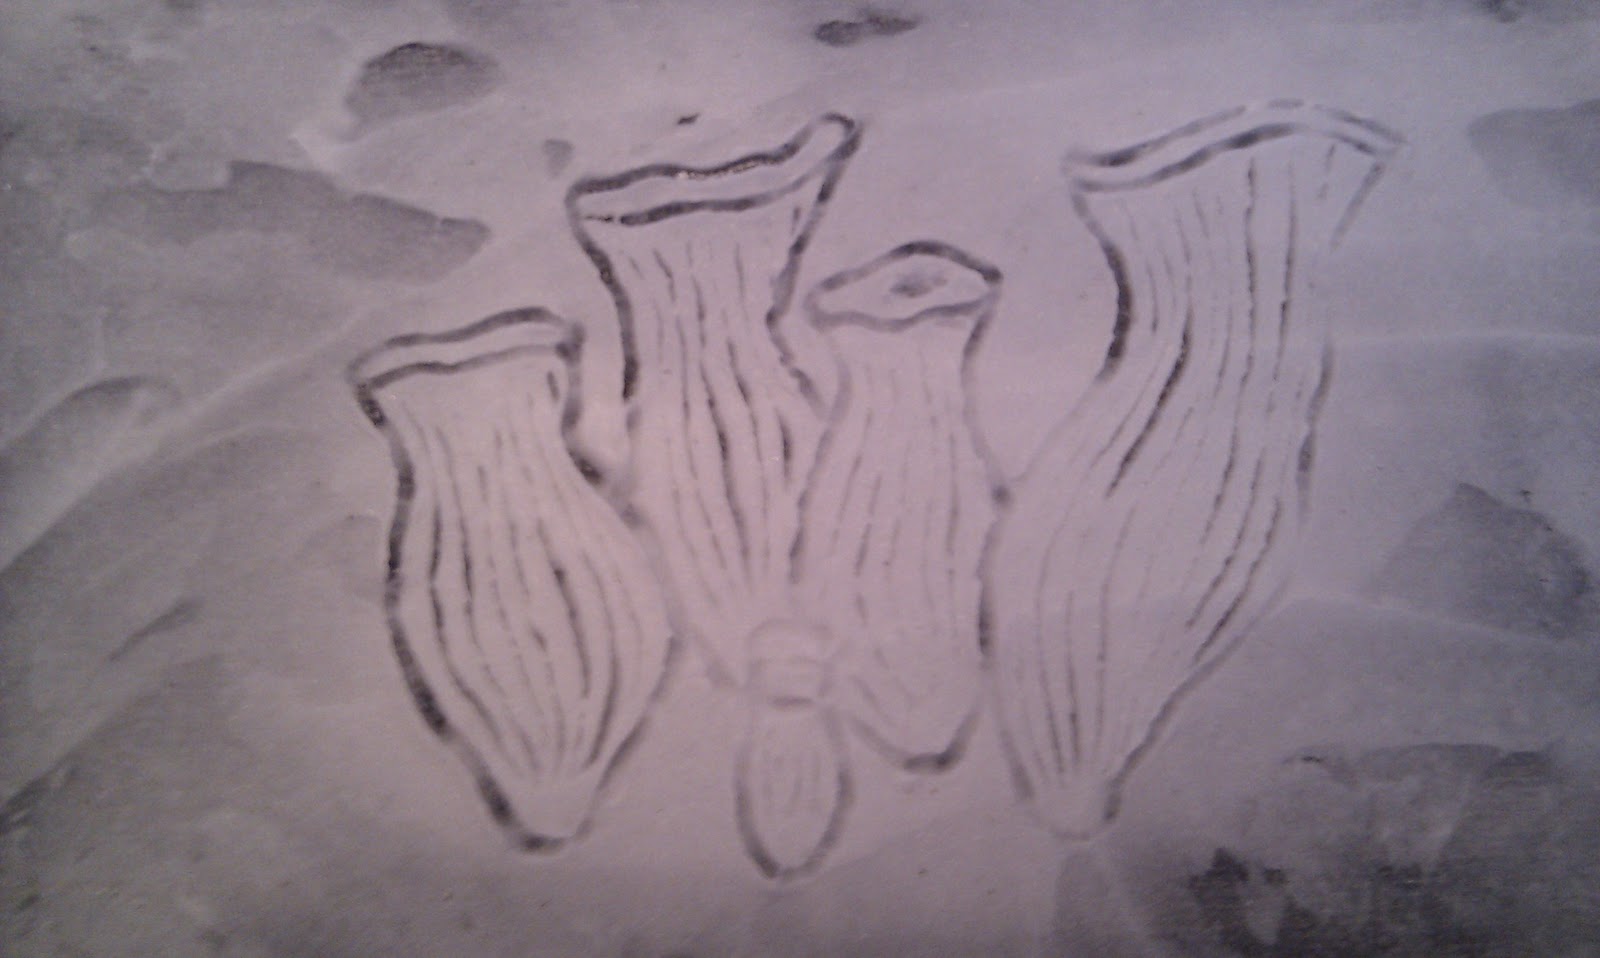
If you check my "Mobile Event Horizon" blog entries you will see that I put the moulding paste on and waited for it to dry. This time I want more control over the thickness of the lines so I'm engraving the wet paste.

As you can see, this strange fungus looks a little bit like bent jugs or vases. Very peculiar stuff. Obviously we are not finished with this yet. I now have to wait for the paste to dry which could take a few days (although I hope that it will be quicker than that as it is only up to about 1mm thick).

Sunday 29 January 2012

Arty breakfast + does the new photo setup work with a mobile camera?

Yesterday, (as I forgot I'd snapped this), I had a really nice breakfast so why not share it here! OK, not art but it set me up with a good start. Quite simple but extremely yum. Porridge oats, raisins, 4 -5 chopped grapes and a couple of chopped dates. Here it is looking all nice before I mixed it up with some nice yogurt (after which it did not really look nice but was!).

Om nom nom nom...


More from today: 
Does the new photography setup help with a mobile phone camera?

I currently have an (early-ish?) HTC Desire and, on the whole, the camera is mediocre. Or worse. Even if you pull the back off to get the pocket lint off the lense (another design flaw I think).

I took 8 low incidence test shots with it. All had diffused sunshine coming in from several sources and 2 photography lights but even with that it had trouble with the focus/"shutter" speed/etc. to the extent that only 1 of the shots was OK. The colour was improved (but still not great) in all of them but you just need more than that (i.e. when you're out & about with just your mobile). Here is the "OK" shot:


OK, I know that you don't expect much from most mobile phone cameras but I think the results from mine mobile are not great. The thing just needs so much help. I know that it is poor in low light with loads of noise but with this much help things should be so much better.

It may seem like this is a bit off topic but, for me, I frequently snap things with my mobile that I think might form the seed of an idea later. I don't really want that seed to be stunted any more than necessary. Once my phone company "deal" has burnt out I think the camera on my next device will be a very high priority. Obviously I could carry a proper camera everywhere but who wants to do that?

New painting photography setup - other results

You obviously cannot beat real sunshine! I did try to see how my new setup compares but it was always going to be unfair. Just as well because it cuts my re-work of previous painting photos to just a few, most of which I've now done.

Here is another one where the new results are better (between old & new photo setups, not sunshine V not sunshine. Of course.):


Here the colour representation made the image too orange.
 It is sometimes not until you have two things to compare that you start to see what's what.
This is a much closer colour representation of my "Grand Unification Formula" painting.


But this guy needs more sunshine, someone send him on holiday away from the rain! Note the 2 shaddows from my setup (which can be good for picking out profile details but possibly not so good straight on (which is something I need to do for most of my paintings when I want a quality shot prior to framing). I have other ways to deal with shadows so I can decide if I want them or not.
Two shadows
Bye for now.

New painting photography setup - framed "Atom Smasher: Pink Particle" old & new.

Carrying on with my new photography setup today...

I still have the reflection in the glass of course, I will remove the glass at some point to do another photo (but want to get other things right first) and then the reflections will be gone. Anyway, at the moment I am concentrating on improving the colour representation of my photos so here is the result of that:
Old results of colour representation.

New results - much more vivid if I say so myself.
I think this will help people to enjoy my paintings more. Even the frame looks better.

Saturday 28 January 2012

New painting photography setup

I have been increasingly frustrated by the lack of sun for taking photos of my paintings so I have changed how I take the pictures. I'm sure you can find all about it on the photography web sites but, in essence it simply involves making sure there is enough light.

Here is a "old" next to "new" setup to compare.


Old
new

The photo on the right is much closer to the real colouring of my painting and you can see that there is a gulf of difference. I am almost shocked at how bad it is! Obviously I will have to add re-shooting some of my painting photos done on days with no sun (luckily I normally wait for the sun).


Friday 27 January 2012

Another admin & stuff day...

I have a new project consisting of a series of probably 15 paintings. I needed to source the materials, frames etc. and I also had lots of admin so that's today gone with no new photos.

I will see if I have enough materials to start the series, perhaps over the weekend so keep a look out.

Thursday 26 January 2012

Mobile Event Horizon (part 2 - complete)

Wow, I made great progress today and I really like the result. Remember that most of the images in this post are done on a simple mobile phone camera.

 Here's my first bit of pencil work. Yes, it's a mobile phone. I am imagining a scenario in the future where people start to turn up the things of today as fossils. Obviously this will be 1000s of years from now. What will they make of it?
 

 Now sometimes there will be old fossils and new ones (in rare cases). Here I have done a little test engraving (as I have a new engraver) and I've coloured it to check that the moulding stuff does what I expect it to.
 
 A pencil fish, now engraved. The pencil marks will go when I clean things up after all the engraving is done.


Now you can see that I have a large plant in my picture too. What else?


Now you can see just about everything. There are a few old fossils, some more recent creatures (as fossils), the plant but what about the phone? I am imagine that much of it will have eroded so some mineral deposits will colour the rock.

Time for a clean up before we start putting the paint on. Paint time:

I have used a sandstone colour applied with a high water content using a brush. I have then used a blotting material to fade the sandstone colour ready for additional colouring. I imagine people in the future will have no idea what some things they find are but that they will have things to help them. A simple thing might be a "DNA stain" that identifies organic matter. The old fossils would be too old to register but the newer ones would leave enough of a tell tale sign.

Now I have added the "DNA stain" but what about that mobile phone?

Mobile Event Horizon by Kevin Bramhill
There you have my impression of how the fossil slab will look. All that is left of the iPhone is a mineral deposit as the rest has been eroded by time. You can see a bigger picture of this painting

As always, I hope that you like it.

Atom Smasher: Pink Particle (update - now framed)

My "Atom Smasher: Pink Particle" painting is now framed and I must say, it looks great.

Here we are, see for yourself...


Of course we have the ago old problems of reflection from the glass so although the frame looks fine here the photo does not show off the nice colours in this painting to great effect. You will just have to take a look for yourself at the real painting, it is lovely.

Wednesday 25 January 2012

Seashore Time (part 6, complete).

Again I had hoped to get more done but today I "had" to do some admin things. Some things need tending to more urgently than others!

I'd planned to work on my "Mobile Event Horizon" but the moulding layer is not quite ready.

I have been waiting for some sunshine which did not arrive so I decided to photograph my "Seashore Time" painting and add a little more of my thoughts behind this to my website. I can always update the photo.

Here is it is (you can see a larger version and my thoughts HERE).

"Seashore Time" by Kevin Bramhill - check my website for the bigger picture.
I hope that you like it.

Tuesday 24 January 2012

Another admin & stuff day...

The moulding stuff on my "Mobile Event Horizon" painting is not hard enough for me to work with yet. I did start another painting but was not happy with the pencil stage so I completely erased it. Some days are like that. I think a few extra glasses of wine followed by a below par kip sometimes leave you with a day when it's best to just do other stuff.

So today was an "admin & stuff" day. Let's see what tomorrow brings.

Monday 23 January 2012

Mobile Event Horizon (part 1)

I had hoped to get a decent photo of my "Seashore Time" painting but the sun would not behave when I had the space available. Instead I varnished a few of my paintings and then started a new one...

I started "Mobile Event Horizon". I want to start this off with the entire canvas looking a little like a big slab of stone. I start off with some lighter stone colours...

Mobile Event Horizon - stage 1: lighter stone colours.
The lighter colours cover the entire canvas. I now want slightly less coverage with darker colours.

Mobile Event Horizon - stage 2: darker stone colours.
At this point you might remark that it could be made to look even more slab like. If you were to continue seeing this surface in this way I would agree but I will be adding a new layer that will heavily defuse the colour.

On goes some course moulding paste. As you can see, it is applied in a fairly deep layer and with deliberate variation in depth. Once dry, a little of the previous light & dark colour will show but not much.
Mobile Event Horizon - stage 3: moulding paste waiting to set.
I am not quite sure how long this will take to set as it varies with temperature so it may be a few days before I continue with this work.

Friday 20 January 2012

Seashore Time (part 5)

The light is a bit better today. Time for some sea...
Seashore Time - sea added - structure.
In the same way that I did the sky I have simply gone over all that fine detail in the structure without worrying about it. The sea paint is a blend of a few colours plus a little water.

Let's take a look at those children. You can see the ghostly remains of them and you can also see that the leg of the thing by the staring girls head (on the right) has been partly painted over by the sea paint too.

Seashore Time - sea added - ghostly children remain.
 Time to start painting in a little more of the children. I started with the shorts & top for the girl on the left and I then went on to do all the hair. The order is not too important here although it helps to do all the hair at once as all the colours are a sequence of colour blends done at the same time.

Seashore Time - hair here!

 In case you are interested in the shading for the clothes you can see it done here. On goes the purple shirt with the darkest bit in shadow...

Seashore Time - purple shirt stage 1.
Next I simply blend the "stripes" together. I don't always do it this way. Sometimes I dip the brush in one colour and then the next and rely on the time it takes to get through each layer of paint as I drag it over the place I want it.

Seashore Time - purple shirt stage 2

Now let's take a look at all the children. This is as far as I will paint them today except for a little shadowing around them perhaps.
Seashore Time - children just about done I think.

Next comes re-painting the structure where I went over it with the sea colour. Now I'm guessing I don't need to show you the result of just that. Following this I want to add some reflection artefacts to the sea from the structure in it. You can see that I've done this with deeper blue here.
Seashore Time - structure with reflections.

There is also the tiniest bit of shading but not too much. You can see that this structure is largely silhouetted but what is it and where is it? Find out soon.

Thursday 19 January 2012

Seashore Time (part 4)

Today we had another poor start as far as natural light goes but at times like this I can usually find something to do where this is not an issue. I decide to start painting in the seashore. This will be a process involving a number of stages. This first stage is really just a background colour. If I was painting a scene with an entirely sandy beach I could probably stop at this stage...
Seashore Time - beach 1st stage.
The beach here is heavily littered with stones. Lots and lots of them. First I paint in some darker patches. Next I am going to spatter a variety of colours for my stones. At each stage I am increasing the size of the brush I spatter from and towards the end the paint is not heavily mixed so that some of my "stones" will have swirls and marks on them. Here you can see that I've covered the white section from above with news paper to keep the spatter off.
Seashore Time - beach 2nd stage.
 This will probably not be the last stage for the beach. It will take quite some time for the acrylic to dry so I'm going to leave the beach for now.

Next, while the beach dries I will darken the structure again. Simple but not quick (and I have to do it with the structure upside down to avoid the wet beach!).
Seashore Time - structure stage 4
What will tomorrow bring?

Wednesday 18 January 2012

Seashore Time (part 3)

This morning was a bit misty with drizzle for occasional company. Not the best way to start the mornings painting normally but my plan for the first part of today involves using all the same colour. I want to colour in that structure.

Some of you may wonder why I have not put a background in yet. You will need to wait for that one.

Seashore Time, structure stage 3A, vertical lines.
I find it easier to do the vertical lines and then turn the cavas 90 degrees so that the horizonal lines are also (now) vertical lines. I then finish off by painting in the large area.

Seashore Time, structure stage 3B, filled in.
 Now you may be wondering why I have not used any shading. Well if you know what you have seen then you should be able to work out an occasion when you'd not expect any shades.

Next I am going to start putting in some background. But "back to front" you may cry! No, I am simply going to paint the background over the structure!
Seashore Time, structure stage 3C, upper background stage 3A.
 Remember that you can not see all the canvas yet. The upper background is going on in stages. Time for the next stage but why am I letting the structure fade away? Why would I paint over it?
Seashore Time, structure stage 3C, upper background stage 3B. 
You will have to wait to find out what happens to the structure as it's quite late but as a parting shot I thought you might like to see the staring girl. She too is by something painted in. Is it in the structure above. I will tease you a little more. The girl is standing by something that belongs to the structure in my painting!
Seashore Time, staring girl stage 3.
Take care!

Tuesday 17 January 2012

Seashore Time (part 2)

I have continued to add to the pencil drawing stage on my large canvas today.

I have modified the first structure that I showed you in part 1. It is not so tall now but is much wider. Yesterday I estimated that it took up about 1/9th of the canvas but today it is perhaps around 1/6th.

Seashore Time, structure 1 day 2.
Now people who know the city where I live (Brighton, England) who have been to the sea front in the last 10 years should recognise the above structure. I think that for now I am going to keep the rest of you guessing.

I have also added some other things to my picture. I want a couple of girls running away from something but not in fright or at great speed.

Seashore Time, girls running away.
 I also want a girl staring at something. And what is the structure that she is standing by? Is it the other structure or somewhere else?
Seashore Time, girl staring.
 There is also a boy doing something, what could it be and where will he be?
Seashore Time, boy doing something.
There is a little more of the drawing that I have not shown you and I've obviously not let you see all the parts in context yet. I hope to make progress tomorrow so take another look soon.

Monday 16 January 2012

Seashore Time (part 1)

Today I started a new panoramic painting. It is quite a lot larger than those I've done over the last 3 months or so and I'm looking forward to seeing how it pans out. The canvas is 900 x 600 mm (about 3 feet x 2 feet).

Obviously from the title of this post you get an idea of the theme. Note that the pinky colour etc. in the picture below is not acutally on the canvas, it's just a facet of the phone camera etc. that I used.This is still just pencil on white canvas at the moment.

This part of Seashore Time is incomplete. It takes up about a 9th of the canvas.


Given that hint (of the title), can you work out what this is yet?

Recycled Man

I set myself a challenge today.

I have an oversized loaded paint brush and some paletted paint that I want to make something with. I decide to do this in a very green fashion and will see if I can use what I already have at my disposal. No fresh brush (of a more conventional size). No water. No extra paint. Just what I have already open or in use. 

Recycled Man

 You can see a larger version of this chap on my web site HERE.